
Photo Upscaler vs Image Enhancer: What's the Difference, and Which Do You Need?
The two terms get used as if they meant the same thing, and many tools (ours included) do both. But they solve different problems. An upscaler gives a photo more pixels. An enhancer changes how the existing pixels look: less noise, sharper edges, better colour or contrast. Knowing which problem you have saves time and avoids the most common way people ruin a photo, which is applying the wrong fix as hard as possible.
The one question that decides it
Look at the photo at the size you're going to use it, and ask: is it too small, or does it look bad at this size?
- Too small: it looks fine as a thumbnail but goes soft or blocky when you print it, use it full screen or zoom in. That's a resolution problem. You need an upscaler.
- Bad at its size: even small, it's grainy, dull, too dark or soft. That's a quality problem. You need an enhancer, or a better photo.
- Both: an old, small, grainy photo. Then you need both, in the right order.
A quick test: zoom to 100% on a computer. If the photo looks clean at 100% but you need it bigger, upscale. If it looks noisy or dull even at 100%, enhance.
What an upscaler does
An upscaler takes an image of, say, 1000 × 750 pixels and produces one of 2000 × 1500 or 4000 × 3000. The new pixels have to come from somewhere. A plain resize, the kind any editor does, estimates them by averaging neighbouring pixels, which produces soft edges. An AI upscaler uses a neural network trained on pairs of small and large images to predict what the missing detail most likely looks like.
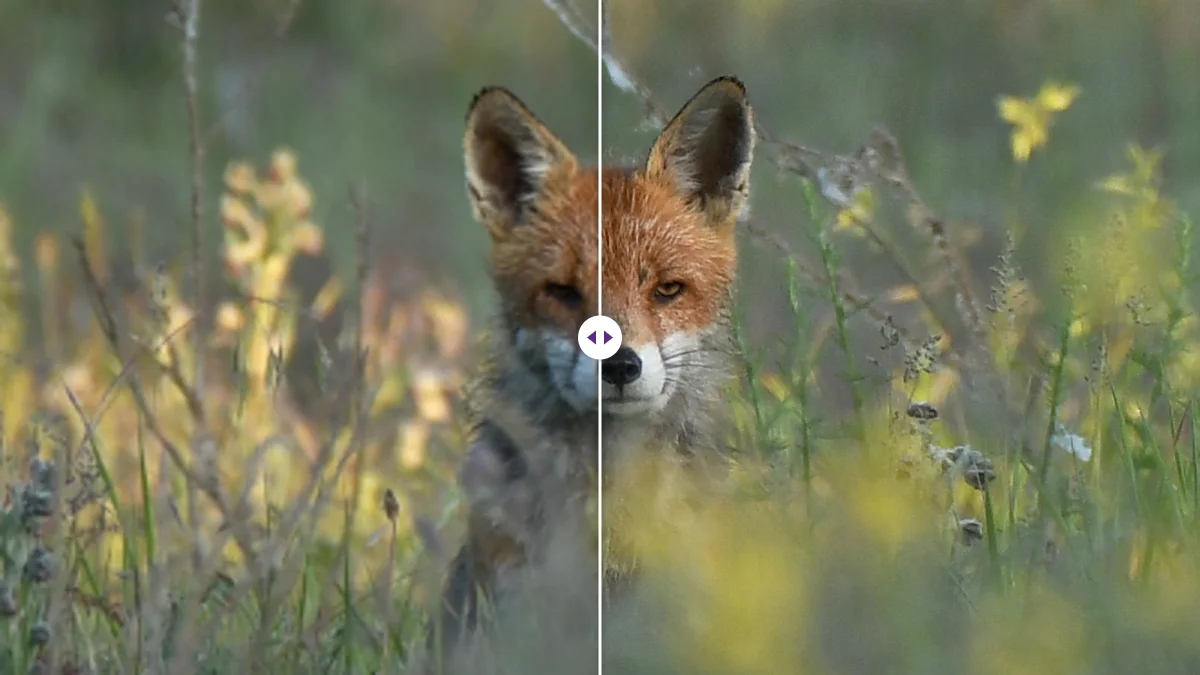
The difference is measurable. When we reduced a portrait to 480 × 480 pixels and enlarged it 4x, the AI version had much crisper edges than the browser's own high-quality resize. The eyes, eyelashes and hairline came back as defined shapes rather than a soft blur.
What an upscaler doesn't do on its own is change the character of the photo. A grainy photo upscaled is a bigger grainy photo (often with grain the model has tidied into a pattern). A dull photo stays dull. A blurred photo stays blurred, just larger.
What an enhancer does
"Enhancer" covers a bundle of adjustments. The common ones, and what they actually change:
- Denoise smooths random grain and colour speckles from dim-light photos. Too much and skin and fabric go waxy.
- Sharpening increases contrast along edges so they look crisper. Too much and bright halos appear around dark edges.
- Detail recovery brings back fine texture, often after denoising has smoothed it.
- Clarity adds contrast in the mid-tones, making a flat or hazy photo look more defined.
- Colour and tone (brightness, contrast, saturation, vibrance) fix dull or faded pictures.
Some "AI enhancers" go further, with models built for one job: restoring faces, removing scratches from old prints, or colourising black-and-white photos. Those are powerful and also the most likely to invent things: a face-restoration model produces a face that looks plausible, not necessarily the actual person's features. Worth keeping in mind for family photos where the likeness matters.
Using both: the order matters
When a photo needs both, the order that works is:
- Clean up noise first, before or as part of upscaling. Enlarging noise makes it harder to remove, and sharpening noise makes it worse.
- Upscale to the size you need.
- Then add detail or sharpness, lightly, on the enlarged image, if it still looks soft.
- Colour and contrast can go anywhere, but are easiest to judge at the end.
Our image upscaler is built around this order: the eight sliders (Sharpness, Brightness, Saturation, Contrast, Denoise Level, Detail Recovery, Clarity and Vibrance) are applied as part of the same run, with noise and colour handled before the final sharpening. For a grainy old photo, a sensible start is Denoise Level at 10 to 15 and everything else at zero; run it, look, then try Detail Recovery at 10 if it looks too smooth, and only then touch Sharpness.
Which tool for which photo
| The photo | Problem | What to use |
|---|---|---|
| Clean 800-pixel product photo for a zoomable listing | Too small | Upscale 2x, no enhancement |
| Phone photo from a dark restaurant, full size | Noise | Denoise only; no upscale needed |
| Faded 1980s print, scanned at 600 dpi | Colour and contrast | Enhance colour; the scan already has enough pixels |
| Grainy 640 × 480 photo from an early digital camera, for a print | Both | Denoise, upscale 4x, light detail recovery |
| Screenshot with small text for a slide | Too small | Upscale; keep sliders at zero (sharpening text adds halos) |
| Photo with motion blur | Neither tool fixes it | Re-shoot if possible |
Three worked examples
A 2009 phone photo from a birthday party, 1600 × 1200, grainy, wanted as an 8 × 10 print. Two problems: noise and size. An 8 × 10 print at 300 ppi needs 3000 × 2400, so the photo needs 2x. In the upscaler: Denoise Level 15, factor 2x, everything else at zero. Check faces at 100%. If skin looks waxy, run again with Denoise at 10 and Detail Recovery at 10. Export JPG at the default quality.
A crisp 600 × 600 product photo from a supplier, for a shop that wants 1000 pixels for zoom. One problem: size. Factor 2x, sliders at zero, JPG. Adding sharpness here would only add halos around the product's outline, which marketplace compression then exaggerates.
A full-size phone photo from a concert, dark and noisy, for Instagram. One problem: noise. No upscaling needed: Instagram shows posts at 1080 pixels wide, and the photo is already several times that. A noise-reduction pass in any editor, a crop to 4:5, and a resize to 1080 wide in the image compressor are all it needs. Upscaling would make a larger noisy photo that Instagram then shrinks again.
What these have in common: deciding the problem first takes ten seconds and decides everything after it. Most bad results we see come from skipping that step and applying every slider to every photo.
A word on "one-click enhance" buttons
Many apps offer a single enhance button that does several of these things at once. They're convenient and often decent on average photos, because they apply moderate amounts of each adjustment. The drawback is that you can't see which change helped and which hurt. If a one-click result looks slightly off (plastic skin, haloed edges, oversaturated colour), you'll usually get a better result by doing the steps separately and stopping as soon as the photo looks right.
The limits of both
Neither upscaling nor enhancing recovers information that isn't in the photo. Three situations come up again and again:
- Motion blur and missed focus. The detail was never recorded. Sharpening adds edge contrast to a blur, which looks harsh rather than sharp.
- Tiny details. A face that's 20 pixels wide or a number plate across 30 pixels can be made bigger and smoother, but the result is the model's guess. Don't rely on it for anything where accuracy matters.
- Heavy compression. Blocks from a badly compressed JPG can be softened with denoise, but the detail they replaced is gone. A better original beats any processing.
Even where they work well, AI tools have a characteristic look: in our portrait test, the AI result had crisp eyes and hair but slightly smoother skin than a real high-resolution photo. That's usually welcome in a family print. It's worth knowing if you're preparing images where realism is the point.
How to avoid overdoing it
The most common problem we see isn't a weak tool, it's a heavy hand. Signs you've gone too far:
- Thin bright outlines around dark edges: too much sharpening.
- Skin that looks like plastic: too much denoise, or denoise without detail recovery.
- Orange faces and neon skies: too much saturation; use vibrance instead.
- Crunchy, gritty texture everywhere: too much clarity or detail recovery.
The fix is always the same: go back to zero and add one adjustment at a time, checking at 100% after each change. Compare with the original side by side; the upscaler's comparison slider is there for exactly that.
A note on screenshots and graphics
Everything above is about photos. Screenshots, charts, logos and other graphics follow slightly different rules. They're made of flat colour and sharp lines, so denoise and detail recovery have nothing useful to do and can smear text. If a screenshot is too small, upscale it with every slider at zero and save it as PNG, which stores flat colour and text cleanly. If it looks bad at its current size, the usual cause is that it was saved as a low-quality JPG somewhere along the way; take a fresh screenshot instead of trying to repair the old one. For logos, ask for the vector file (SVG, PDF, EPS or AI) before trying any of this.
After either one
Upscaled and enhanced photos are often larger files than you need. Save photos as JPG or WebP rather than PNG; in our tests a 2x photo was 6.85 MB as PNG and 337 KB as WebP with no visible difference. If you need a specific file size for a form or a site, the image compressor can aim at a target in KB. And if you want to understand how many pixels a print or screen really needs, the guide on how to increase image resolution has the numbers, while our post on what the "AI" in AI upscaler means explains how the model decides what to add.
Frequently asked questions
Do I need an upscaler or an enhancer?
If the photo looks fine small but goes soft when shown bigger, upscale it. If it looks grainy, dull or dark even at its current size, enhance it. Old, small, grainy photos need both.
Should I denoise before or after upscaling?
Before. Our upscaler applies the Denoise Level to the original before the AI model enlarges it, because the model treats grain as detail and would otherwise turn it into a crisp speckle pattern.
Why does my enhanced photo look like plastic?
Too much denoise, or denoise without detail recovery. Go back to zero and add one adjustment at a time, checking at 100% after each change.
Keep reading
Free image tools, right in your browser
Upscale, remove backgrounds, strip metadata, crop, compress or make a QR code. No upload, no signup, no watermark.