
How to Bring Old Family Photos Back to Life: Scan, Clean Up, Enlarge, Share
Old family photos come in two kinds, and they need slightly different handling. There are prints: small, often faded, sometimes curled or scratched. And there are early digital photos: files from the cameras and phones of the 2000s, often only 1 to 3 megapixels. Both can be brought back to a state where they look good on a modern screen and print well at a sensible size. This guide is the workflow we'd follow, step by step, with the numbers that matter at each stage and an honest note on what free tools can't do.
Step 1: get the best possible digital copy
For prints, everything later depends on this step. A good scan gives you more real detail than any amount of processing afterwards, so it's worth doing carefully once.
With a flatbed scanner
- Scan at 600 dpi for normal prints. A 6 × 4 inch print at 600 dpi gives 3600 × 2400 pixels, enough to reprint it at twice the size. For very small prints (wallet photos, old contact prints), go to 1200 dpi.
- Clean the glass and the print with a soft, dry brush or a lens cloth. Dust on the glass becomes white specks on every scan.
- Turn off automatic "enhancement" in the scanning software if you can, and save the scan as PNG or TIFF. You want a faithful copy to work from; you can always adjust later, but you can't undo heavy automatic sharpening.
- Scan in colour, even for black-and-white prints. Old monochrome prints have warm or cool tones that a greyscale scan throws away.
With a phone
If there's no scanner, a phone works surprisingly well with a little care. Lay the print flat by a window in daylight, avoid direct sun and flash (both cause glare on glossy prints), hold the phone exactly parallel to the print so it doesn't come out as a trapezium, and fill the frame with the print. Take several shots and keep the sharpest. A modern phone photo of a 6 × 4 print usually ends up with 2000 to 3000 pixels across the print once you crop it, which is plenty for screens and fine for reprints at the same size.
For early digital photos
Find the original files rather than copies. Photos that have been emailed, posted or sent through messaging apps over the years have often been shrunk and re-compressed several times. Check old memory cards, backup discs and the computer they were first copied to. The original from a 2005 camera might be 2048 × 1536; the copy someone shared might be 640 × 480.
Step 2: crop and straighten
Crop before anything else. Remove the scanner bed, the white border (unless you want to keep it as part of the look) and anything that isn't the photo. Everything left at the edges will otherwise be enlarged and processed along with the picture, wasting time and pixels.
The image cropper handles this in your browser. Choose Free for an exact fit, or a fixed shape if you're planning a reprint at a standard size: Photo 3:2 for 6 × 4 inch prints, for example. It can also rotate a scan by 90 degrees and flip it, but not by small angles, so a print that went onto the scanner slightly crooked is best straightened by laying it square against the glass edge and scanning again. The "Selection" readout below the photo tells you how many pixels you're keeping, which matters for the next step.
Step 3: decide whether it needs enlarging
Many people upscale every old photo by reflex. Check first. Divide the pixels you have by the pixels the final use needs:
- For a reprint at 6 × 4 inches: about 1800 × 1200 pixels. A 600-dpi scan of a 6 × 4 print (3600 × 2400) is already double that; don't upscale.
- For an 8 × 10 inch enlargement: 2400 × 3000 pixels. A scan of a small 3.5 × 2.5 inch print at 600 dpi is 2100 × 1500, so it needs 2x.
- For a 4K screen or a digital photo frame: 3840 × 2160 at most; most frames are much smaller.
- An early digital photo at 1600 × 1200 for an 8 × 10 print needs 2x (3200 × 2400) to get close to 300 pixels per inch.
The guide on how to increase image resolution has the full table of print sizes.
Step 4: enlarge what's small
For the photos that do need more pixels, open the image upscaler on a computer (on phones it uses a simpler, non-AI engine). Choose the factor from step 3; for grainy prints and indoor photos from early digital cameras, set Denoise Level to 10 before the first run. Leave everything else at zero and compare the result with the original at 100%.
What to expect, honestly. When we reduced a portrait to 480 × 480 pixels and enlarged it 4x, the AI version had much crisper edges than an ordinary resize: eyelashes, teeth and the hairline came back as defined shapes. The skin came out smoother than in a real high-resolution photo, like a light retouch. That's typical: an upscaler rebuilds edges and shapes convincingly and fills fine texture with something plausible. For a family photo on the wall, it's usually exactly what people want. For identifying a face in the background of a tiny print, treat the result as a guess.
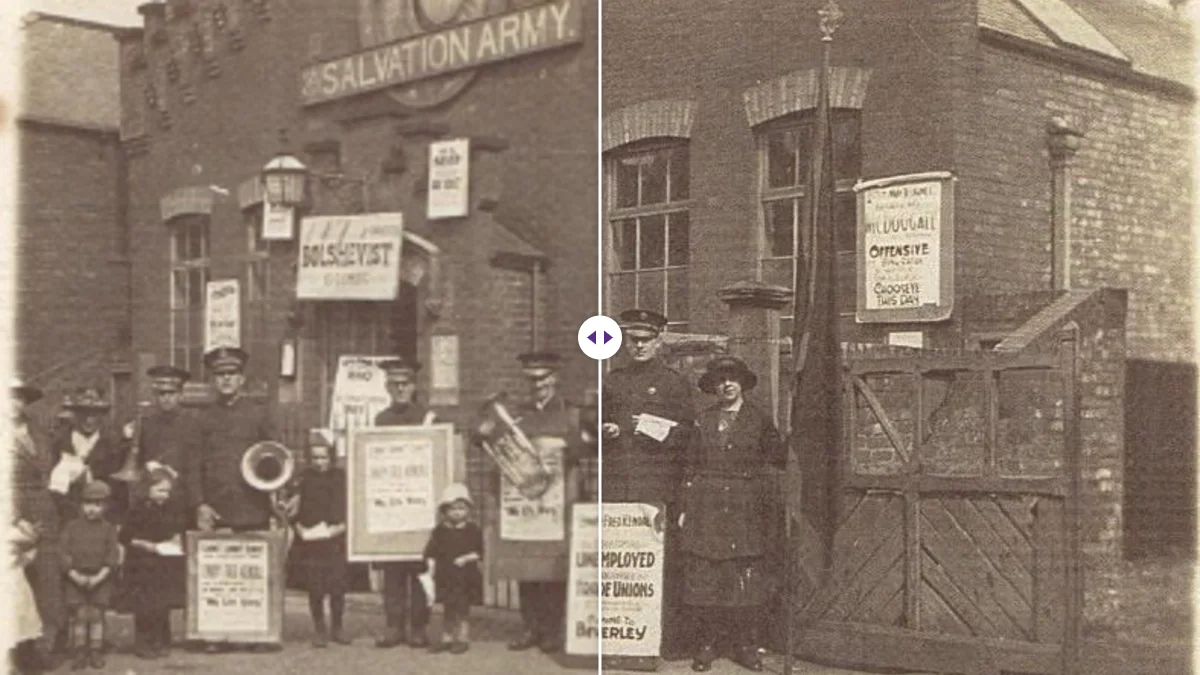
Two things upscaling won't fix: blur from camera shake or missed focus, and physical damage like cracks and stains, which get enlarged along with everything else.
Step 5: faded colour and contrast
Colour prints from the 1970s to the 1990s often fade unevenly: cyan dyes tend to go first, leaving a warm, red or yellow cast and washed-out contrast. A few slider adjustments fix most mild cases:
- Contrast up a little, to bring back the darks.
- Vibrance before Saturation: vibrance lifts the muted colours more than strong ones, so skin tones are less likely to turn orange.
- Brightness only if the whole picture is too dark or too light.
- Clarity sparingly, for a flat, hazy print.
These are applied by the upscaler as part of the same run, so you can enlarge and correct in one pass. Make small changes and compare. For strong colour casts, a photo editor with separate colour-balance controls or an automatic colour-restoration feature will do better than global sliders; that's one of the jobs a free browser tool doesn't fully cover.
Step 6: keep a master, make copies
Save the cleaned, enlarged version as a master file in a lossless format (PNG), with a clear name: year, place, who's in it if you know. Keep the raw scan too. Then make copies for each use:
- For printing: a high-quality JPG at the print size.
- For email and family chat groups: a smaller JPG. Messaging apps shrink photos anyway; sending a sensible size yourself means you choose the quality. The image compressor can make a 2000-pixel-wide copy, or aim at a file size such as 100 KB for forms and old email systems.
- For sharing originals with relatives: send the master as a file or document, not as a photo, so it isn't re-compressed on the way.
A note on privacy and old photos
Scans don't contain GPS data, but early digital photos sometimes do, and phone photos of prints carry the location of where you photographed them (usually your home). The files our upscaler, cropper and compressor produce contain no camera data at all, because each one saves a new image; we checked. If you share unprocessed originals, the metadata remover strips the location without changing the picture. Before posting family photos publicly, also think about what's visible: names on documents, house numbers, school uniforms.
Organising a whole box of photos
If you're digitising more than a handful, a little organisation up front saves hours later. Sort prints by event or year before scanning, and scan each group in one session with the same settings. Name files with the date first (for example 1987-07-beach-01), so they sort in order in any folder or app. Note anything written on the back of a print before you scan it, and scan the back too if the handwriting itself matters to the family.
For the upscaling step, the image upscaler's Bulk tab takes up to 20 images at a time with the same settings and returns them in one ZIP, which suits a group of similar scans: the same denoise level and factor for all the small prints from one album, for example.
The workflow in short
- Scan at 600 dpi (1200 for tiny prints), or photograph flat in daylight. Find original digital files.
- Crop and straighten.
- Work out whether it needs enlarging, and by how much.
- Enlarge on a computer, with a little Denoise for grainy photos.
- Correct faded colour gently.
- Keep a lossless master and make copies for print, email and sharing.
It's slow the first time and quick after that. The careful scan is the part that pays off most; every later step works with whatever detail it captured.
Frequently asked questions
What resolution should I scan old photos at?
600 dpi for normal prints and 1200 dpi for very small ones, in colour, saved as PNG or TIFF with any automatic enhancement in the scanning software turned off.
Can upscaling fix scratches or blur?
No. It enlarges the photo and rebuilds edges, but cracks, stains, camera shake and missed focus stay, and they get bigger along with everything else.
How do I share restored photos without losing quality?
Keep a lossless PNG master, send relatives the file as a document rather than as a photo in chat apps, and make smaller JPG copies for email.
Keep reading
Free image tools, right in your browser
Upscale, remove backgrounds, strip metadata, crop, compress or make a QR code. No upload, no signup, no watermark.