
5 Mistakes People Make With a Free AI Image Upscaler (and Two We Made Ourselves)
An AI upscaler is one of the simplest tools to use: add a photo, pick a factor, download. That simplicity is also why the same handful of mistakes turn up again and again. None of them are dramatic, but each one costs you either quality, time or a file that's ten times bigger than it needs to be. Here are the five we see most, with the numbers from our own tests that show why they matter, and two mistakes that were ours rather than yours.
1. Choosing 4x by default
Bigger sounds better, so people pick the largest factor. But the right factor is the one that reaches the size you actually need, and nothing more.
Here's what the extra factor costs. On our test computer, a 1.7-megapixel photo took about 20 seconds at 2x. A 960 × 1280 photo took 16.6 seconds at 2x and 18.6 seconds at 4x, and the 4x file was more than twice as large (756 KB against 315 KB as WebP). The 4x result was 3840 × 5120 pixels: about 20 megapixels for a photo that was probably going on a web page or a slide.
The fix is a ten-second sum. Divide the width you need by the width you have, then round up to 2 or 4:
- A 1920 × 1080 image for a 4K screen needs exactly 2x.
- A 600-pixel product photo for a store that wants 1000 pixels for zoom needs 2x.
- A 640 × 480 photo for an 8 × 10 inch print needs about 4.7x at 300 pixels per inch, so 4x, and you accept a little under 300 ppi. It still looks fine in a frame.
The guide on how to increase image resolution has a full table of print sizes and the pixels each one needs.
2. Saving photos as PNG
PNG has a reputation as the "high quality" format, so it feels like the safe choice. For photos, it's mostly a way to make enormous files.
In our tests, a 1600 × 1066 photo enlarged 2x came out at 6.85 MB as PNG, 581 KB as JPG and 337 KB as WebP. A portrait enlarged to 1920 × 1920 was 1.24 MB as PNG, 141 KB as JPG and 57 KB as WebP. On screen, side by side, the three versions looked the same. PNG is lossless, which matters for screenshots, logos and graphics with text, and wastes space on photos.
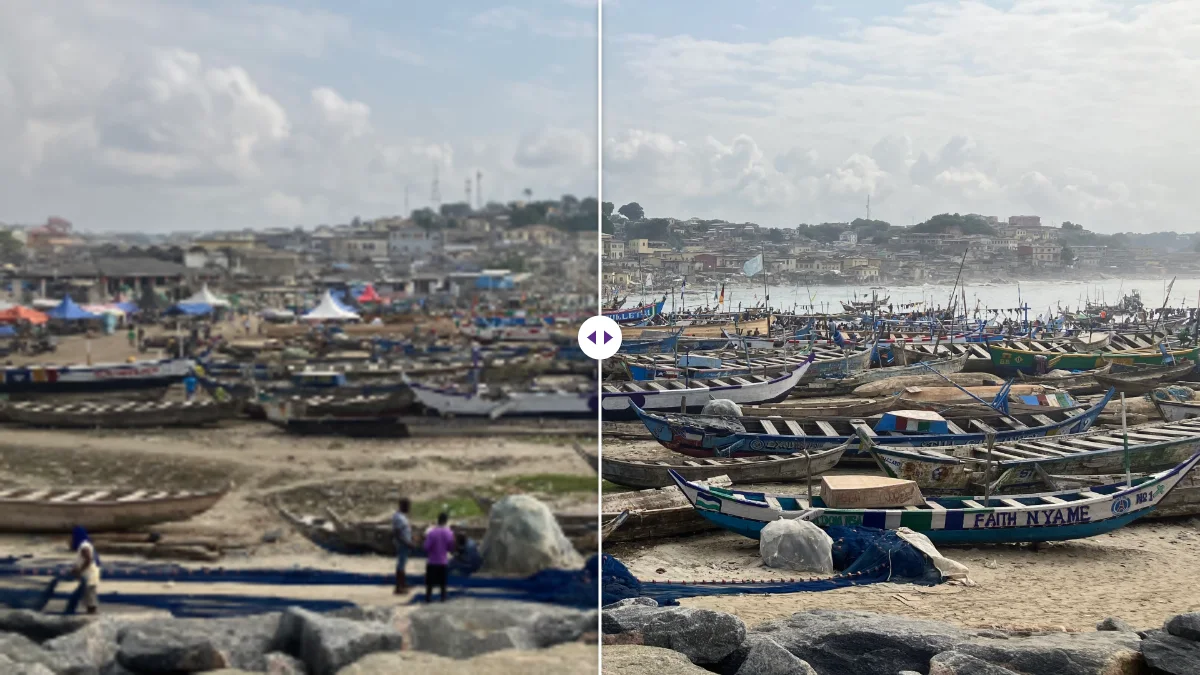
Use WebP if the place you're uploading accepts it, JPG if you're not sure, and PNG only when you'll keep editing the file or it's a graphic with sharp text. If a form still rejects the result as too large, run it through the image compressor, which can aim for a size in KB while keeping the new dimensions.
3. Changing the dpi instead of the pixels
A print shop asks for "300 dpi". You open the photo in an editor, change 72 to 300, save, and send it. It gets rejected again.
We tested exactly this: we took a 960 × 1280 JPG and set its dpi field to 300. The file stayed 117,361 bytes, to the byte. Five bytes in the header changed; every pixel was identical. The only effect was on the size the file claims to print at: 960 pixels at 300 dpi is 3.2 inches wide, where the same pixels at 72 dpi claim 13.3 inches.
The dpi number is an instruction, not quality. What the printer actually needs is enough pixels to fill the print at 300 per inch: 2400 × 3000 for 8 × 10 inches, 2480 × 3508 for A4. If the photo doesn't have them, that's when the upscaler earns its keep.
4. Upscaling a copy instead of the original
The most common source of disappointing results isn't the upscaler at all. It's the file going into it.
Photos sent through messaging apps the normal way are compressed and shrunk. Images saved from social media have been resized for the feed. Screenshots of photos are smaller still and compressed twice. A phone photo that left the camera at 4032 × 3024 can easily arrive at 1600 pixels wide with visible compression blocks. Upscale that, and the AI faithfully enlarges the blocks along with the picture.
So before you enlarge anything, check whether a better original exists. Ask the sender to share the photo as a document or file, download it from the cloud library rather than a shared preview, or ask whoever posted it for the full-size file. For logos, ask for the vector version (SVG, PDF, EPS or AI), which scales perfectly. A bigger original beats any upscaler.
5. Turning up sharpness on a noisy photo
The enhancement sliders are tempting: a photo looks a bit soft, so you push Sharpness to 40. On a clean photo that adds halos; on a grainy, low-light photo it's worse, because sharpening sharpens the grain too.
The order that works is: leave the sliders at zero for the first run and look at the result. Most AI results are sharp enough as they are. If the photo is grainy, set Denoise to 10 or 15 and run again. Only then, if it still looks soft, add a little Sharpness or Detail Recovery. One slider at a time is slower, but it's the only way to see what each one does to your picture. Thin white outlines around dark edges mean you've gone too far.
A sixth one: upscaling images that are already big enough
Sometimes the best use of an upscaler is not using it. An image only needs more pixels if the place it's going will show more pixels than it has.
A quick way to check: compare the image's width with the width it will actually be displayed or printed at. A 1600-pixel photo going into a 1200-pixel column on a website is already larger than it will be shown; upscaling it only makes the page slower. A 3000-pixel product photo for a marketplace that zooms at 1000 pixels is three times what's needed. Most current phone photos (4032 × 3024) already have more pixels than a 4K screen; for a wallpaper they need cropping to 16:9, not enlarging.
Where the extra pixels do help is print, large screens and zoom. If the image will be shown smaller than its current size, reduce it instead, and if it needs to be under a file-size limit, compress it. Both are jobs for the image compressor, not the upscaler.
There's also a quality argument for leaving big images alone. Every AI pass invents a little detail. On a photo that already has enough real detail, that invention adds nothing and can make textures look slightly artificial. Upscaling works best as a rescue for images that genuinely don't have enough pixels.
A bonus mistake: expecting the AI to recover what isn't there
We reduced a portrait to 480 × 480 pixels and enlarged it 4x. Measured against an ordinary resize, the AI version had much crisper edges, and the eyelashes, teeth and hairline were clearly defined. But the skin came out smoother than in a real high-resolution photo, a little like a light retouch.
That's the honest limit of every AI upscaler: shapes and edges are rebuilt convincingly; fine random texture (pores, fabric weave, gravel) is invented to look plausible, not recovered. For a print on the wall, that's fine. For reading a number plate or identifying a face in a tiny image, an upscaled result is a guess and should be treated as one.
And two mistakes that were ours
We test our own tools on real tasks, and twice that turned up bugs worth admitting.
The "JPG" that was really a PNG. Until October 2026, choosing JPG in our upscaler saved PNG data with a .jpg name, because the code asked the browser for a format name it didn't recognise. A 4x "JPG" was 1.24 MB; after the fix the same export is 141 KB. If you downloaded oddly large JPGs from us before then, running the photos through again will give you much smaller files.
Cut-outs that came back on black. While testing whether to remove the background or upscale first, we found that upscaling a transparent PNG turned its transparent area solid black: the AI model only reads colour, and transparent pixels read as black. The upscaler now keeps transparency and puts JPG output on white.
A quick checklist
- Start from the best original you can get.
- Work out the factor from the size you need; choose 2x unless 4x is genuinely required.
- Leave the sliders at zero for the first run. Denoise before sharpening.
- Download WebP or JPG for photos, PNG for graphics.
- Check the result at 100% before you print or upload.
- On a phone, expect the classic engine rather than the AI model; for small or old photos, use a computer, where the AI runs for images up to about 10 megapixels.
If your goal is a specific screen size, the guide on how to upscale an image to 4K covers aspect ratios and when you don't need to upscale at all. Most current phone photos, for example, already have more pixels than 4K and only need cropping.
Frequently asked questions
Should I choose 2x or 4x?
Divide the width you need by the width you have and round up. 2x covers Full HD to 4K and most product photos. Choose 4x only when 2x falls short, because it takes longer and makes a much bigger file.
Which format should I save an upscaled photo in?
WebP for the smallest file, JPG if you're not sure the destination accepts WebP, and PNG only for screenshots, logos and graphics with text. In our test the same photo was 6.85 MB as PNG and 337 KB as WebP.
Does changing the dpi make a photo sharper for printing?
No. Changing 72 to 300 dpi only edits a number in the file header; every pixel stays the same. A print needs enough pixels, for example 2480 × 3508 for A4 at 300 pixels per inch.
Keep reading
Free image tools, right in your browser
Upscale, remove backgrounds, strip metadata, crop, compress or make a QR code. No upload, no signup, no watermark.