
Free Image Upscaler Online: How to Upscale Images Without Limits, Signups or Watermarks
You can upscale images online for free without an account, a watermark or a daily limit, as long as the tool does the work on your own computer rather than on a server. That's how our image upscaler works, and it's the reason it can stay free without conditions. This post walks through using it properly: one photo, a batch of twenty, which settings are worth touching, which format to download, and what to do with the file afterwards.
Why it can be free without limits
Most "free" upscalers process your image on a server. Every image costs them graphics-card time, so they limit it: credits, low-resolution free downloads, watermarks or a signup. That's a reasonable business, but it's why the free version rarely gives you the file you need.
A browser upscaler works differently. The page downloads the AI model once (it's cached afterwards), and your own graphics card runs it. Each extra image costs us nothing, so there's nothing to ration. It also means your photos are never uploaded, which matters when they're family pictures, documents or products you haven't launched.
The trade-off is honest and worth knowing: a browser can only run a compact model. Ours is a small AI model that runs in desktop and laptop browsers. On phones and tablets the page uses a classic, non-AI engine instead, because mobile browsers don't give web pages enough memory for the model.
Upscaling one photo, step by step
- Add the photo. On the image upscaler, stay on the Single tab and click the upload area or drop a JPG, PNG or WebP onto it.
- Choose the Enlarge Factor. "2x (200%) - Fast" or "4x (400%) - Balanced". Pick the one that reaches the size you need; the next section shows how.
- Leave Image Enhancement Tools alone for now. All sliders start at zero. For a clean photo, keep it that way.
- Pick the export format. WebP for the smallest file, JPG if you're not sure where it's going, PNG for graphics or further editing.
- Click Upscale Image. The first run downloads and prepares the model, so it's the slowest. On our test computer, later runs took 3 to 6 seconds for a 480-pixel image at 4x and about 20 seconds for a 1.7-megapixel photo at 2x.
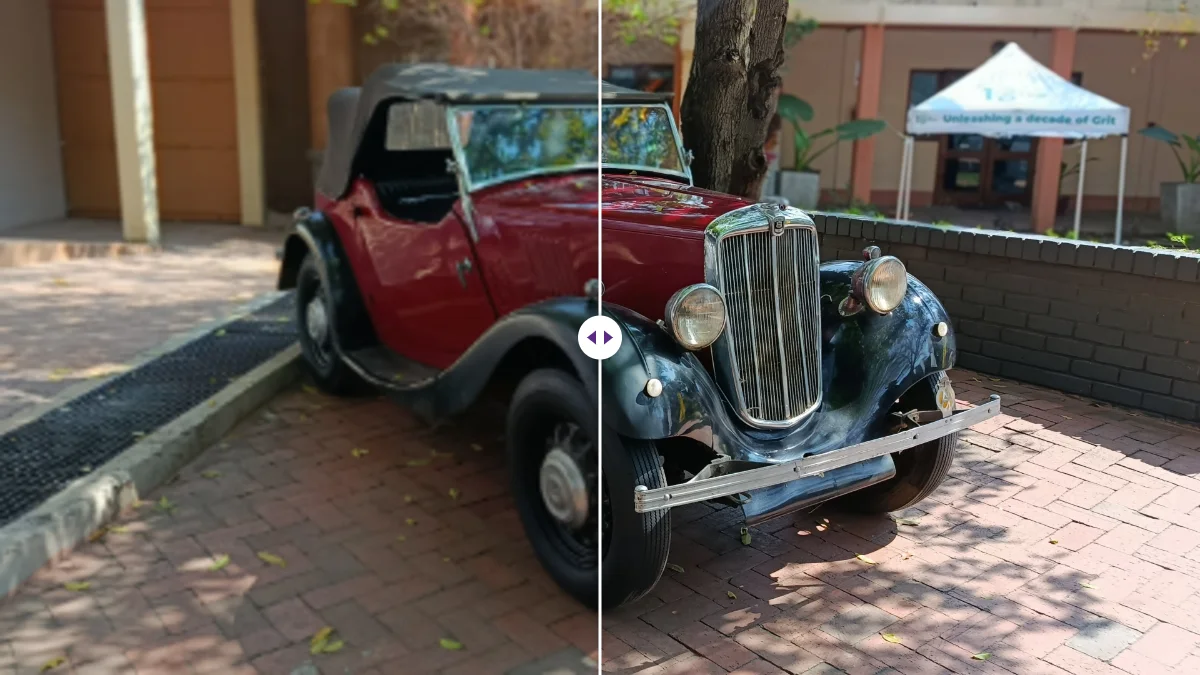
- Check, then download. Drag the comparison slider and zoom in on faces, text or edges. Under the preview you'll see the original and new file sizes, the dimensions and the processing time. The status message also says whether the AI or the classic engine ran.
One quirk we noticed in testing: the processing starts on the next screen refresh, so if you click Upscale Image and immediately switch to another browser tab, it waits until you come back. Stay on the tab for a second after clicking.
Choosing the factor
Divide the width you need by the width you have and round up to the next option. A few common cases:
- Full HD to 4K: 1920 to 3840 pixels is exactly 2x.
- A product photo for a shop that wants 1000 pixels for zoom: a 600-pixel original needs 2x.
- A 640 × 480 photo for a 6 × 4 inch print: about 1800 pixels are needed, so 4x (2560) covers it; 2x (1280) falls short.
- A 300-pixel image from an old document for a slide: 4x gives 1200 pixels, enough for most slides.
Choosing 4x when 2x would do just makes a bigger file and a longer wait. The guide on how to increase image resolution lists the pixels needed for every common print size.
When to use the sliders
The eight sliders (Sharpness, Brightness, Saturation, Contrast, Denoise Level, Detail Recovery, Clarity and Vibrance) run after the upscale. On a clean photo the honest advice is to skip them. They help on photos that were already in poor shape:
- Grainy indoor or night photo: Denoise Level 10 to 15, run, look.
- Result looks too smooth or plastic: Detail Recovery 10 to 15, and lower Denoise if you used it.
- Flat, hazy photo: a little Clarity.
- Still soft after all that: a little Sharpness. If thin bright outlines appear around dark edges, go back down.
Change one slider at a time. It's slower, but it's the only way to see what each one does to your particular photo.
Upscaling a batch of up to 20 images
Switch to the Bulk tab when you have a set of images that need the same treatment: product shots for a listing, scans from one album, screenshots for a presentation.
- Add up to 20 images (each up to 100 MB).
- Set the factor, sliders and format once; every image in the batch gets the same settings.
- Click "Enlarge All & Download ZIP". The images are processed one after another and downloaded together as a single ZIP.
The total time is roughly the single-image time multiplied by the number of images, since your graphics card does one at a time. If the images differ a lot (some grainy, some clean), split them into two batches with different slider settings rather than compromising.
Which format to download
This choice changes the file size far more than the look of the picture. From our tests, all at the same dimensions:
- A portrait enlarged to 1920 × 1920: PNG 1.24 MB, JPG 141 KB, WebP 57 KB.
- A cat photo enlarged to 3200 × 2132: PNG 6.85 MB, JPG 581 KB, WebP 337 KB.
The three looked the same on screen. Choose WebP when the destination accepts it (most websites and modern apps do), JPG when you're unsure (forms, email, older software), and PNG for screenshots, graphics with text, logos and anything you'll edit further. If you upscale an image with a transparent background, choose PNG or WebP to keep the transparency; with JPG, the transparent area becomes white.
Three jobs, start to finish
An old 640 × 480 camera photo for a 6 × 4 inch print. The print needs about 1800 × 1200 pixels. Choose 4x (2560 × 1920), set Denoise Level to 10 if the photo was taken indoors, export JPG, and check faces at 100%. Crop to the 3:2 print shape in the image cropper afterwards so the lab doesn't decide what gets cut.
Twelve supplier product photos at 600 × 600 for a shop. Switch to Bulk, add all twelve, choose 2x, leave the sliders at zero, choose JPG, and click "Enlarge All & Download ZIP". You get twelve 1200 × 1200 images, enough for most shops' zoom. If the shop wants pure white backgrounds, run them through the background remover afterwards.
A 1920 × 1080 screenshot for a 4K presentation screen. Choose 2x for exactly 3840 × 2160, and export PNG: screenshots are full of sharp text and flat colour, which PNG stores cleanly and compactly. JPG would add faint smudges around the letters.
Limits worth knowing
- AI input size: the AI model is used for source images up to about 10 megapixels. Larger photos use the classic engine, and usually don't need upscaling anyway.
- Output size: the tool is made for results up to 4K. If your computer can't hold an image that large, the tool reduces the target automatically and tells you.
- Phones: classic engine only. For small or old photos, use a computer if you can.
- What it can't fix: motion blur and missed focus. Upscaling enlarges what's there and rebuilds edges; it doesn't refocus a photo.
After upscaling: common next steps
- Too big for an upload form? The image compressor can hit a target size in KB while keeping the new dimensions. There are guides for 100 KB and 50 KB limits.
- Need a different shape? Crop it in the image cropper, for example to 16:9 for a wallpaper or 4:5 for Instagram.
- Need a new background? Run it through the background remover. If the photo was small, upscaling first and removing the background second gave us crisper edges.
- Sharing the original too? The upscaled file carries no camera data or location (we checked with an iPhone photo that had GPS in it), but the original still does. The metadata remover strips it without touching the picture.
If something goes wrong
The first upscale of a session is slow because the model is being downloaded and prepared; later ones are much quicker. If the result says it was auto-limited, your computer couldn't hold an image that large and the tool reduced it; choose 2x instead of 4x, or crop first. And if the status message says the classic engine ran on a computer, the photo was probably larger than about 10 megapixels, which usually means it didn't need upscaling in the first place.
A note on what "free" costs you here
Nothing, in money or data. What the page does use is your computer: the model download on first use, graphics memory while it runs, and a few seconds to a minute of processing per image. On an older laptop the first run is slow and the rest are fine. That's the whole trade, and for most everyday jobs it's a good one. For very heavy, regular use with a strong graphics card, a desktop app may suit you better; our honest comparison covers when.
Frequently asked questions
Why is the first upscale slow?
The AI model downloads and warms up the first time. Later runs are much faster: 3 to 6 seconds for a 480-pixel image at 4x on our test computer.
How many images can I upscale at once?
Bulk mode takes up to 20 images, each up to 100 MB, with the same settings, and downloads them together as one ZIP.
Does the upscaler work on a phone?
Yes, but phones use the classic engine instead of the AI model, because mobile browsers don't give web pages enough graphics memory. For small or old photos, use a computer.
Keep reading
Free image tools, right in your browser
Upscale, remove backgrounds, strip metadata, crop, compress or make a QR code. No upload, no signup, no watermark.